Sunday, July 1, 2018

Simple Image Classification with Keras


Keras logo

There are several kind of image classification:
  • Binary classification
  • Multiclass classification
  • Multi label classification
Image generation method for training
  • image.ImageGenerator.flow_from_directory()
  • image.ImageGenerator.flow()
Various models for training (built on model)
  • Xception
  • VGG16
  • VGG19
  • Resnet50
  • InceptionV3
  • InceptionResNetV2
  • MobileNet
  • DenseNet 
  • NASNet
  • MobileNetV2
Keras built in models usually have pre-trained weight on Imagenet, which significantly speeds up training, but those weights are only available for some image sizes.

There are two techniques to feed image files for prediction in Keras:
  • keras.preprocessing.image.flow_from_directory() 
  • keras.preprocessing.image.flow()

Simple Tutorials

Reference

Simple Multiclass Image Classification with Keras


This tutorial shows how to do multiclass image classification with Keras, using keras.preprocessing.image.flow_from_directory() to feed the image files for training and prediction.

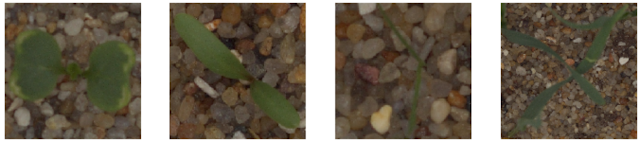
Plant Seedlings Classification dataset


Prepare Directory Structure

  • download dataset from  https://www.kaggle.com/c/plant-seedlings-classification/data
  • put original training files in <root>/data/train
  • put original test files in <root>/data/test/0 . Caution: test files must be put into a directory under /data/test. For simplicity, we create /data/test/0, but any directory name is okay, as long as it is under /data/test
  • create <root>/plant-src to store source codes
Here is the directory structure after previous steps:


Import Libraries


 import tensorflow as tf  
 import keras as keras  
 import os  
 from keras.layers import Flatten, Dense, AveragePooling2D, GlobalAveragePooling2D  
 from keras.models import Model  
 from keras.optimizers import RMSprop, SGD  
 from keras.callbacks import ModelCheckpoint  
 from keras.callbacks import EarlyStopping  
 from keras.preprocessing.image import ImageDataGenerator  
 from keras.callbacks import CSVLogger  
 from keras.layers.normalization import BatchNormalization  
 import numpy as np  
 from keras.models import load_model  
 from pathlib import Path  
 import shutil   

Make Training & Validation Directories

Create directories for training and validation set. A little bit complicated, since flow_from_directory() required that each class has it's own directory.

 #making training & validation directories  
 import pathlib  
 session='simpleNASNet'  
 classnames=['Black-grass','Charlock','Cleavers','Common Chickweed','Common wheat','Fat Hen','Loose Silky-bent','Maize','Scentless Mayweed','Shepherds Purse','Small-flowered Cranesbill','Sugar beet']  
 train_dir="../"+session+"/train"  
 valid_dir="../"+session+"/valid"  
 for dirname in classnames:  
 #  print(dirname)  
   fulldirname=train_dir+'/'+dirname    
   print(fulldirname)  
   pathlib.Path(fulldirname).mkdir(parents=True, exist_ok=True)  
   fulldirname=valid_dir+'/'+dirname    
   print(fulldirname)  
   pathlib.Path(fulldirname).mkdir(parents=True, exist_ok=True)  

Split training data between training set and validation set. Usual 80%-20% split is used.

 #copy image files, split 80% training- 20% validation  
 counter=0  
 for root, dirs, files in os.walk(original_data_dir):  
    for file in files:  
       fullfilename = os.path.join(root, file)        
       basename=os.path.basename(fullfilename)  
       #detect image classification from directory name  
       split1=os.path.split(fullfilename)        
       split2=os.path.split(split1[0])  
       classname=str(split2[1])#classname for this particular file  
       if((counter%5)==0): #copy validation  
         dst_filename=valid_dir+"/"+classname+"/"+basename  
         shutil.copyfile(fullfilename,dst_filename)      
       else:       #copy training    
         dst_filename=train_dir+"/"+classname+"/"+basename  
         shutil.copyfile(fullfilename,dst_filename)      
       counter=counter+1  

Model

Prepare model, we use NASNet with 331x331 input, using pre-trained weight from Imagenet. Top layers are omitted, and replaced with a Dense layer of 1024 cells and 12 cells output layer for each class. Output activation is softmax, which is usual for multiclass classification.

 #prepare model  
 img_width=331  
 img_height=331  
 network_notop = keras.applications.nasnet.NASNetLarge(input_shape=(img_width, img_height, 3),  
                                  include_top=False,  
                                  weights='imagenet', input_tensor=None,  
                                  pooling=None)      
 x = network_notop.output  
 x = GlobalAveragePooling2D()(x)      
 x = Dense(1024, activation='relu')(x)      
 x = BatchNormalization()(x)  
 predictions = Dense(12, activation='softmax')(x)  
 the_model = Model(network_notop.input, predictions)  

Training

Standard training.
Specific parameter for multiclass classification:
  • loss='categorical_crossentropy' in model.compile()
  • class_mode='categorical' in flow_from_directory()

 #training  
 learning_rate = 0.0001   
 logfile = session + '-train' + '.log'   
 batch_size=4  
 nbr_epochs=10  
 print("training  directory: "+train_dir)  
 print("valication directory: "+valid_dir)  
 optimizer = SGD(lr=learning_rate, momentum=0.9, decay=0.0, nesterov=True)  
 the_model.compile(loss='categorical_crossentropy', optimizer=optimizer, metrics=['accuracy'])  
 csv_logger = CSVLogger(logfile, append=True)  
 early_stopping = EarlyStopping(monitor='val_loss', min_delta=0, patience=10, verbose=1, mode='auto')  
 best_model_filename=session+'-weights.{epoch:02d}-{val_loss:.2f}.h5'   
 best_model = ModelCheckpoint(best_model_filename, monitor='val_acc', verbose=1, save_best_only=True)  
   # this is the augmentation configuration we will use for training  
 train_datagen = ImageDataGenerator(  
     rescale=1. / 255,  
     shear_range=0.2,  
     zoom_range=0.2,  
     rotation_range=90,  
     width_shift_range=0.2,  
     height_shift_range=0.2,  
     horizontal_flip=True,  
     vertical_flip=True)  
 val_datagen = ImageDataGenerator(rescale=1. / 255)  
 print('prepare train generator')   
 train_generator = train_datagen.flow_from_directory(  
     train_dir,  
     target_size=(img_width, img_height),  
     batch_size=batch_size,  
     shuffle=True,  
     classes=classnames,  
     class_mode='categorical')  
 print('prepare validation generator')   
 validation_generator = val_datagen.flow_from_directory(  
     valid_dir,  
     target_size=(img_width, img_height),  
     batch_size=batch_size,  
     shuffle=True,  
     classes=classnames,  
     class_mode='categorical')  
 print('fit generator')   
 the_model.fit_generator(  
     generator=train_generator,  
     epochs=nbr_epochs,  
     verbose=1,  
     validation_data=validation_generator,  
     callbacks=[best_model, csv_logger, early_stopping])  

Training progress
 training  directory: ../simpleNASNet/train  
 valication directory: ../simpleNASNet/valid  
 prepare train generator  
 Found 3800 images belonging to 12 classes.  
 prepare validation generator  
 Found 950 images belonging to 12 classes.  
 fit generator  
 Epoch 1/10  
 950/950 [==============================] - 635s 669ms/step - loss: 1.2295 - acc: 0.6039 - val_loss: 0.6469 - val_acc: 0.7979  
 Epoch 00001: val_acc improved from -inf to 0.79789, saving model to simpleNASNet-weights.01-0.65.h5  
 Epoch 2/10  
 950/950 [==============================] - 557s 586ms/step - loss: 0.6281 - acc: 0.7929 - val_loss: 0.3840 - val_acc: 0.8674  
 Epoch 00002: val_acc improved from 0.79789 to 0.86737, saving model to simpleNASNet-weights.02-0.38.h5  
 Epoch 3/10  
 950/950 [==============================] - 557s 586ms/step - loss: 0.5220 - acc: 0.8345 - val_loss: 0.3026 - val_acc: 0.9000  
 Epoch 00003: val_acc improved from 0.86737 to 0.90000, saving model to simpleNASNet-weights.03-0.30.h5  
 Epoch 4/10  
 950/950 [==============================] - 558s 587ms/step - loss: 0.4369 - acc: 0.8566 - val_loss: 0.2830 - val_acc: 0.9105  
 Epoch 00004: val_acc improved from 0.90000 to 0.91053, saving model to simpleNASNet-weights.04-0.28.h5  
 Epoch 5/10  
 950/950 [==============================] - 558s 588ms/step - loss: 0.3722 - acc: 0.8842 - val_loss: 0.2310 - val_acc: 0.9253  
 Epoch 00005: val_acc improved from 0.91053 to 0.92526, saving model to simpleNASNet-weights.05-0.23.h5  
 Epoch 6/10  
 950/950 [==============================] - 559s 588ms/step - loss: 0.3213 - acc: 0.8966 - val_loss: 0.2210 - val_acc: 0.9232  
 Epoch 00006: val_acc did not improve from 0.92526  
 Epoch 7/10  
 950/950 [==============================] - 556s 585ms/step - loss: 0.3202 - acc: 0.8939 - val_loss: 0.2190 - val_acc: 0.9263  
 Epoch 00007: val_acc improved from 0.92526 to 0.92632, saving model to simpleNASNet-weights.07-0.22.h5  
 Epoch 8/10  
 950/950 [==============================] - 559s 589ms/step - loss: 0.2997 - acc: 0.9063 - val_loss: 0.1861 - val_acc: 0.9389  
 Epoch 00008: val_acc improved from 0.92632 to 0.93895, saving model to simpleNASNet-weights.08-0.19.h5  
 Epoch 9/10  
 950/950 [==============================] - 554s 584ms/step - loss: 0.2469 - acc: 0.9203 - val_loss: 0.1942 - val_acc: 0.9379  
 Epoch 00009: val_acc did not improve from 0.93895  
 Epoch 10/10  
 950/950 [==============================] - 557s 587ms/step - loss: 0.2619 - acc: 0.9147 - val_loss: 0.1695 - val_acc: 0.9421  
 Epoch 00010: val_acc improved from 0.93895 to 0.94211, saving model to simpleNASNet-weights.10-0.17.h5  

Prediction & Submission

Caution: test files must be put into a directory under /data/test. For simplicity, we create /data/test/0, but any directory name is okay, as long as it is under /data/test . This behavior is quite strange, but maybe to make flow_from_directory() work the same way for training phase and prediction/inference phase.

#prediction   
 batch_size=4  
 nbr_test_samples=794    
 img_width=331  
 img_height=331  
  #choose weights file manually   
 weights_path = 'simpleNASNet-weights.10-0.17.h5' # choose file manually, filename may be different  
 test_data_dir = '../data/test/'   
 test_datagen = ImageDataGenerator(rescale=1./255)   
 test_generator = test_datagen.flow_from_directory(   
    test_data_dir,   
    target_size=(img_width, img_height),   
    batch_size=batch_size,   
    shuffle = False, # no shuffling, since filenames must match predictions. Shuffling may change file sequence   
    classes = None, #    
    class_mode = None)   
  test_image_list = test_generator.filenames   
  print('Loading model and weights')   
  predict_model = load_model(weights_path)   
  print('Begin to predict for testing data ...')   
  predictions = predict_model.predict_generator(test_generator, nbr_test_samples)   
  np.savetxt(session+'-predictions.txt', predictions) # store prediction matrix, for later analysis if necessary   

Constructing submission file
 #submission  
 submission_file=session+'-submit.csv'   
 print('Begin to write submission file:'+submission_file)   
 f_submit = open(submission_file, 'w')   
 f_submit.write('file,species\n')   
 for i, image_name in enumerate(test_image_list):   
   # find maximum prediction of 12  
   max_index=0  
   max_value=0  
   for x in range(0, 12):  
     if(predictions[i][x]>max_value):  
       max_value=predictions[i][x]  
       max_index=x  
   basename=os.path.basename(image_name)   
   prediction_class = classnames[max_index] # get predictions from array     
   f_submit.write('%s,%s\n' % (basename, prediction_class))   
 f_submit.close()   
 print('Finished write submission file ..')  


To check final score, let's go to Late Submission page in Kaggle Plant Seedlings Classification. The score is 0.96095,  which ranks about 400 in leaderboard.

Late submission score

 Reference


Simple Binary Image Classification with Keras

This article is a simple introduction to simple binary classification for images with Keras deep learning library.

There are many ways to do image classification with Keras. Here are the detail of this particular implementation:
Dogs vs Cats classification problem

Prepare Working Directories

First step is to prepare working directory.

Binary classification directory structure


This is the directory structure used in this article.


It's better to use a structured working directory, don't just mix all files in the same directory. You may modify the directory structure to suit your needs.

flow_from_director() expects each class to have its own directory. The directory names must match class names.

Download Dataset

  • Download dataset from Dataset: Dogs vs Cats Redux: Kernels Edition 
  • Put cat images in <root>/data/train/cat
  • Put dog images in <root>/data/train/dog
  • Put test images in <root>/data/test 
Now  we can jump straight into the code. First step is to import libraries.

 import tensorflow as tf  
 import keras as keras  
 import os  
 from keras.layers import Flatten, Dense, AveragePooling2D, GlobalAveragePooling2D  
 from keras.models import Model  
 from keras.optimizers import RMSprop, SGD  
 from keras.callbacks import ModelCheckpoint  
 from keras.callbacks import EarlyStopping  
 from keras.preprocessing.image import ImageDataGenerator  
 from keras.callbacks import CSVLogger  
 from keras.layers.normalization import BatchNormalization  
 import numpy as np  
 from keras.models import load_model  
 import numpy as np  
 from pathlib import Path  
 import os  
 import shutil  

The next step is to define parameters for our deep learning model.
 # preparing parameters     
 image_dir_cat='../data/train/cat' # assuming cat & dog images has been separated in different directories  
 image_dir_dog='../data/train/dog'  
 session = "simple1000" # to differentiate between runs  
 ClassNames = ['cat', 'dog']  
 data_dir="../simple1000" # to differentiate between runs  
 learning_rate = 0.0001  
 img_width = 331 # 331 for pre-trained nasnet  
 img_height = 331  
 nbr_epochs = 10   
 batch_size = 4 # batch size depends on available memory on GPU. GTX 1080 Ti use (4)  
 np.random.seed(2018)  
 train_dir = data_dir + "/train"  
 valid_dir = data_dir + "/valid"    
 number_of_class=len(ClassNames)  
 print("train directory : ", train_dir)  
 print("valid directory : ", valid_dir)    
 print("number of classes: "+ str(number_of_class))  
 logfile = session + '-train' + '.log'  
 print("logfile  :", logfile)  
Explanation:
  • image_dir_cat & image_dir_dog must match the directory where we put our training dataset.
  • session string is useful if we want to make several different run. There will be many weights files, prediction files. If we don't stick to a naming structure, the whole thing can become a jumbled mess
The next step is to prepare files for training step. We have 12500 images of cats and 12500 images  of dogs in the dataset, but in this experiment, we only use 1000 images of cats and 1000 of dogs , to speed up the experiment. We can easily add more files later.

The following code prepares files for the training. For training we use 800 cat images and 800 dog images, while for validation we use 200 cat images and 200 dog images.
 # make training directory  
 # make validation directory  
 # copy images to respective directories  
 print("copy start")      
 def MakeDir(newdir):  
   if not os.path.exists(newdir):  
     os.makedirs(newdir)  
     # make validation & training directories, if not exist yet      
 MakeDir(valid_dir)  
 MakeDir(valid_dir+'/cat')  
 MakeDir(valid_dir+'/dog')  
 MakeDir(train_dir)  
 MakeDir(train_dir+'/cat')  
 MakeDir(train_dir+'/dog')  
 # copy files to working directories  
 print("copy cats")  
 counter=0  
 for root, dirs, files in os.walk(image_dir_cat):  
   for file in files:  
     fullfilename = os.path.join(root, file)  
 #    print(str(counter) + ": " + fullfilename)  
     if(counter<800):  
       shutil.copyfile(fullfilename,train_dir+"/cat/"+file)        
     if(counter>=800 and counter<1000):  
       shutil.copyfile(fullfilename,valid_dir+"/cat/"+file)  
     if(counter>=1000):  
       break  
     counter=counter+1              
 print("copy dogs")        
 counter=0      
 for root, dirs, files in os.walk(image_dir_dog):  
   for file in files:  
     fullfilename = os.path.join(root, file)  
 #    print(str(counter) + ": " + fullfilename)  
     if(counter<800):  
       shutil.copyfile(fullfilename,train_dir+"/dog/"+file)        
     if(counter>=800 and counter<1000):  
       shutil.copyfile(fullfilename,valid_dir+"/dog/"+file)  
     if(counter>=1000):  
       break  
     counter=counter+1  
 print("copy finished")    


Building Model


 # make model with transfer learning  
 if(True):  
   model_notop = keras.applications.nasnet.NASNetLarge(input_shape=(img_width, img_height, 3),  
                                  include_top=False,  
                                  weights='imagenet', input_tensor=None,  
                                  pooling=None)  
     # add a global spatial average pooling layer  
   x = model_notop.output  
   x = GlobalAveragePooling2D()(x)      
   x = Dense(1024, activation='relu')(x) # let's add a fully-connected layer      
   x = BatchNormalization()(x)  
   predictions = Dense(1, activation='sigmoid')(x)  
   deep_model = Model(model_notop.input, predictions)  
Explanation
  • For the first layers, we use model & weight from NASNet, without its fully connected layer. 
  • We replace the NASNet final layer with our own, with 1024 hidden neurons (Dense) and 1 in output layer.
  • Since this is a binary classification, the final layer activation is sigmoid, and only consist of 1 cell.
  • Batch Normalization is added to reduce overfitting
  • The number of hidden layer (1024) is arbitrary, it can be increased or decreased later to find better result.

Train The Model


 # training  
 if(True):  
   sgd_optimizer = SGD(lr=learning_rate, momentum=0.9, decay=0.0, nesterov=True)  
   deep_model.compile(loss='binary_crossentropy', optimizer=sgd_optimizer, metrics=['accuracy'])  
   # set up callbacks  
   csv_logger = CSVLogger(logfile, append=True)  
   early_stopping = EarlyStopping(monitor='val_loss', min_delta=0, patience=2, verbose=1, mode='auto')  
   best_model_file=session+'-weights.{epoch:02d}-{val_loss:.2f}.h5'  
   # best_model_file = session + '-weights' + '.h5'  
   best_model = ModelCheckpoint(best_model_file, monitor='val_acc', verbose=1, save_best_only=True)  
   # this is the augmentation configuration we will use for training  
   train_datagen = ImageDataGenerator(  
     rescale=1. / 255,  
     shear_range=0.2,  
     zoom_range=0.2,  
     rotation_range=90,  
     width_shift_range=0.2,  
     height_shift_range=0.2,  
     horizontal_flip=True,  
     vertical_flip=True)  
   val_datagen = ImageDataGenerator(rescale=1. / 255)  
   print('prepare train generator')  
   train_generator = train_datagen.flow_from_directory(  
     train_dir,  
     target_size=(img_width, img_height),  
     batch_size=batch_size,  
     shuffle=True,      
     class_mode='binary')  
   print('prepare validation generator')  
   validation_generator = val_datagen.flow_from_directory(  
     valid_dir,  
     target_size=(img_width, img_height),  
     batch_size=batch_size,  
     shuffle=True,  
     class_mode='binary')  
   print('fit generator')  
   deep_model.fit_generator(  
     generator=train_generator,  
     #    steps_per_epoch=nbr_train_samples/batch_size, # in Keras 2.2.0, automatically acquired from train generator  
     epochs=nbr_epochs,  
     verbose=1,  
     validation_data=validation_generator,  
     #    validation_steps=nbr_validation_samples/batch_size, # automatically acquired from validation generator  
     callbacks=[best_model, csv_logger, early_stopping])  

training progress
 prepare train generator  
 Found 1600 images belonging to 2 classes.  
 prepare validation generator  
 Found 400 images belonging to 2 classes.  
 fit generator  
 Epoch 1/10  
 400/400 [==============================] - 279s 697ms/step - loss: 0.3509 - acc: 0.8500 - val_loss: 0.1920 - val_acc: 0.9525  
 Epoch 00001: val_acc improved from -inf to 0.95250, saving model to simple1000-weights.01-0.19.h5  
 Epoch 2/10  
 400/400 [==============================] - 230s 574ms/step - loss: 0.3015 - acc: 0.8769 - val_loss: 0.1307 - val_acc: 0.9725  
 Epoch 00002: val_acc improved from 0.95250 to 0.97250, saving model to simple1000-weights.02-0.13.h5  
 Epoch 3/10  
 400/400 [==============================] - 231s 578ms/step - loss: 0.2886 - acc: 0.8869 - val_loss: 0.1337 - val_acc: 0.9675  
 Epoch 00003: val_acc did not improve from 0.97250  
 Epoch 4/10  
 400/400 [==============================] - 233s 581ms/step - loss: 0.3108 - acc: 0.8744 - val_loss: 0.1299 - val_acc: 0.9750  
 Epoch 00004: val_acc improved from 0.97250 to 0.97500, saving model to simple1000-weights.04-0.13.h5  
 Epoch 5/10  
 400/400 [==============================] - 232s 580ms/step - loss: 0.2880 - acc: 0.8863 - val_loss: 0.1093 - val_acc: 0.9775  
 Epoch 00005: val_acc improved from 0.97500 to 0.97750, saving model to simple1000-weights.05-0.11.h5  
 Epoch 6/10  
 400/400 [==============================] - 231s 576ms/step - loss: 0.2284 - acc: 0.9113 - val_loss: 0.0928 - val_acc: 0.9775  
 Epoch 00006: val_acc did not improve from 0.97750  
 Epoch 7/10  
 400/400 [==============================] - 230s 575ms/step - loss: 0.2560 - acc: 0.8969 - val_loss: 0.0935 - val_acc: 0.9825  
 Epoch 00007: val_acc improved from 0.97750 to 0.98250, saving model to simple1000-weights.07-0.09.h5  
 Epoch 8/10  
 400/400 [==============================] - 231s 577ms/step - loss: 0.2461 - acc: 0.9019 - val_loss: 0.0821 - val_acc: 0.9775  
 Epoch 00008: val_acc did not improve from 0.98250  
 Epoch 9/10  
 400/400 [==============================] - 231s 578ms/step - loss: 0.2606 - acc: 0.8981 - val_loss: 0.0722 - val_acc: 0.9825  
 Epoch 00009: val_acc did not improve from 0.98250  
 Epoch 10/10  
 400/400 [==============================] - 231s 578ms/step - loss: 0.2267 - acc: 0.9113 - val_loss: 0.1130 - val_acc: 0.9775  
 Epoch 00010: val_acc did not improve from 0.98250  

Prediction & Submit

Prediction step
 #prediction  
 nbr_test_samples=12500   
 #choose weights file manually  
 weights_path = 'simple1000-weights.07-0.09.h5'  
 test_data_dir = '../data/test/'  
 test_datagen = ImageDataGenerator(rescale=1./255)  
 test_generator = test_datagen.flow_from_directory(  
     test_data_dir,  
     target_size=(img_width, img_height),  
     batch_size=batch_size,  
     shuffle = False, # no shuffling, since filenames must match predictions. Shuffling may change file sequence  
     classes = None, #   
     class_mode = None)  
 test_image_list = test_generator.filenames  
 print('Loading model and weights')  
 predict_model = load_model(weights_path)  
 print('Begin to predict for testing data ...')  
 predictions = predict_model.predict_generator(test_generator, nbr_test_samples)  
 np.savetxt(session+'-predictions.txt', predictions) # store prediction matrix, for later analysis if necessary  

Make submission file

Make submission file, format must match given sample_submission.csv

 # submission  
 submission_file=session+'-submit.csv'  
 print('Begin to write submission file:'+submission_file)  
 f_submit = open(submission_file, 'w')  
 f_submit.write('id,label\n')  
 for i, image_name in enumerate(test_image_list):  
   basename=os.path.basename(image_name)  
   filename, fileext = os.path.splitext(basename)    
   prediction_class  =predictions[i][0] # get predictions from array      
   f_submit.write('%s,%s\n' % (filename, prediction_class))  
 f_submit.close()  
 print('Finished write submission file ..')  

Submit the result to https://www.kaggle.com/c/dogs-vs-cats-redux-kernels-edition/leaderboard , click on "Late Submission"


We got score of 0.10979, still long way from the top (0.03) but not too bad for only 1000 samples.

Reference

  • Tutorial on using Keras flow_from_directory and generators
  • https://www.pyimagesearch.com/2017/12/11/image-classification-with-keras-and-deep-learning/
  • http://blog.kaggle.com/2017/04/03/dogs-vs-cats-redux-playground-competition-winners-interview-bojan-tunguz/
  • Code formatter: http://codeformatter.blogspot.com/

Monday, June 11, 2018

Download the Developer's Guide to Building AI Applications

Download the Developer's Guide to Building AI Applications:
https://info.microsoft.com/ww-landing-ai-developers-bot-ebook.html


Create your first intelligent bot with Microsoft AI.
Artificial intelligence (AI) is accelerating the digital transformation for every industry, with examples spanning manufacturing, retail, finance, healthcare, and many others. At this rate, every industry will be able to use AI to amplify human ingenuity. In this e-book, Anand Raman and Wee Hyong Tok from Microsoft provide a comprehensive roadmap for developers to build their first AI-infused application.
Using a Conference Buddy as an example, you’ll learn the key ingredients needed to develop an intelligent chatbot that helps conference participants interact with speakers. This e-book provides a gentle introduction to the tools, infrastructure, and services on the Microsoft AI Platform, and teaches you how to create powerful, intelligent applications.
  • Understand how the intersection of cloud, data, and AI is enabling organizations to build intelligent systems.
  • Learn the tools, infrastructure, and services available as part of the Microsoft AI Platform for developing AI applications.
  • Teach the Conference Buddy application new AI skills, using pre-built AI capabilities such as vision, translation, and speech.
  • Learn about the Open Neural Network Exchange.

Monday, May 7, 2018

Machine Learning Free Book

Some free book to learn Machine Learning

Statistics

Machine Learning


Neural Network

Deep Learning

 Sources

Wednesday, January 17, 2018

Google Code-In 2017: My Story


Weeks before GCI (Google Code-In) even started, I keep debating with myself whether to join GCI 2017 or not. I was a GCI 2016 participant and my experience with it was not so good. It was kinda a traumatic experience for me.

Long story short, I decided to join. The first thing I have to do is chose an organization I'm interested in. I already knew which organization I'd contribute to, even before I joined; Zulip.

But joining GCI more than a week late (I had some internet problems) ruins my plan. Zulip is a huge community. There sure were a lot of participants. That means I have to do a lot of tasks in order to, well, win? I never expect myself to be a finalist, let alone winning, but I want to push myself to the limit. The competition would be too tough for me, so I prefer to chose other organization.

I scroll through the available organizations and observe them. Surprisingly, a few organizations caught my eyes. OpenWISP, LiquidGalaxy, and CloudCV, to name a few. I feel like I was sorta qualified for them. Not only that, they're all new organizations! A good thing to forget my past, GCI 2016.

I choose CloudCV as the organization I want to work with. I chose it because it's related to Machine Learning, a thing that I've been interested in for the past several months. Perfect.

CloudCV is a young open source organization which builds some platforms for AI and/or Machine Learning. The goal of CloudCV is to make AI research more reproducible. CloudCV has 3 main projects, EvalAIOrigami, and Fabrik.

Fabrik's page


CloudCV's task choices, however, were so limited. At one point, it even only had 7 tasks choices (not counting the beginner tasks)! I mostly give my contributions to Fabrik, such as adding neural network models to its model zoo. Adding a model to Fabrik's model zoo was like a gambling game for me. When you're lucky, it was so easy you feel like you've done nothing. But other times it's really hard I feel like I want to give up.

The first thing I have to do when I want to add a new model to Fabrik is to find a neural network model. At this time of writing, Fabrik only supports 3 frameworks, Caffe, Keras, and Tensorflow. However, Fabrik still has some problems with tensorflow models. I don't have any experience with Caffe so I prefer to go with keras.

After cloning a model I want to add, I have to make sure that the model works perfectly. Some models work well in keras 2, while some others don't. Some works in tensorflow 1.4.1, some don't, etcetera. After running the model smoothly, I have to make a JSON file from it. Then, I have to make sure that Fabrik supports the layers in the model.

Sometimes Fabrik throw me an error and I have to find another model. If Fabrik keeps throwing errors, I have to change the model I want to import, and start working from zero again. Repeat.

In this blog post, I've listed some models I've tried to add to Fabrik. There's more to it though. Right now I have a collection of more than 20 different neural networks models, only because I keep getting errors on most models I tried! Almost all of them use keras as their framework.

Another thing I did was finding AI challenges on the internet. I already know one website; kaggle! But this task makes me even more creative and I scoured the internet for every possible AI challenge I can find. Some of them can be found here.

I also made some graphics for CloudCV:
A logo for Origami


An illustration for Fabrik

I enjoyed working with CloudCV. I like the atmosphere, the community, the nice and helping people, and pretty much everything, even the timezones. Most students in other organization usually have problems with a huge time zone difference with their mentors and ended up being awake all night long. In CloudCV, I was thankful to have mentors whose timezones were close to mine.

One thing that bugs me a little is that CloudCV only had a few mentors. I counted all the mentors whose name appeared on the task pages, and there were only 9 mentors!

A random screenshot of my terminal

Working with CloudCV gave me the experience about programming in the real world. Programming isn't all about coding. Sometimes when you find a problem, you gotta solve it yourself because StackOverflow doesn't have all the answer. Setting up a development environment is the hardest of all. Package versions aren't just numbers, but it plays an important role in a project.

In the future, I hope to contribute more to CloudCV whenever I have enough time.

I got into the leaderboard and I'm pretty happy with that. Thank you to everyone who has helped me through contributing to CloudCV, including my family, other students, and of course, and my mentors. Thanks for dealing with my dumb questions and dealing with me in general.

ps: if you want to ask me questions about GCI, feel free to, I'd be happy to answer.

Simple Image Classification with Keras

Keras logo There are several kind of image classification: Binary classification Multiclass classification Multi label classificat...